How to Run Ethernet Cable Through Walls: A Comprehensive Guide
Running Ethernet cables through walls may seem like a daunting task, but with the right knowledge and tools, it can be a manageable DIY project.
Whether you’re retrofitting your home with phone and internet service or simply looking to optimize your network setup, this guide will walk you through the process step by step.
From planning and preparation to drilling holes and running cables, we’ll cover everything you need to know to successfully run Ethernet cables through walls.
Why Run Ethernet Cables Through Walls?
Before we dive into the nitty-gritty details, let’s first understand why running Ethernet cables through walls is beneficial.
While Wi-Fi is convenient, it may not always provide the fastest and most reliable connection.
Ethernet cables, on the other hand, offer a stable and secure network connection, making them ideal for activities that require high bandwidth, such as streaming, online gaming, and video conferencing.
Running Ethernet cables through walls eliminates the need for unsightly cables running across your floors or walls.
It provides a clean and seamless network setup, allowing you to connect devices directly to the source without any signal loss or interference.
Whether you’re setting up a home office, a media room, or simply want to improve your network performance, running Ethernet cables through walls is a worthwhile investment.
Planning Your Ethernet Wiring
Before you begin running Ethernet cables through walls, it’s important to have a solid plan in place.
This will ensure that you optimize your network setup and minimize any potential issues.
Here are the key steps to consider when planning your Ethernet wiring:
1. Identify the Rooms That Require Cable Hookup
Start by assessing the layout of your house and identifying the rooms that require Ethernet cable hookup.
Consider areas where you have devices that require a stable and high-speed internet connection, such as TVs, desktop computers, landline phones, and media centers.
You may also want to future-proof your setup by running cables to all rooms, even if you currently rely on Wi-Fi for internet access.
2. Locate the Wiring Panel in an Accessible Place
Next, determine the best location for your wiring panel. Ideally, it should be easily accessible and centrally located.
The basement or the laundry room are often convenient choices.
Ensure that the panel is close to the point where your internet service enters your home, as this will make it easier to connect the network wires.
3. Choose the Cable Routes
If your house has a crawl space, routing the Ethernet cables will be relatively straightforward.
However, if you don’t have a crawl space, you’ll need to route the cables from the attic.
Start from the wiring panel and look for hollow walls where you can run the cables up.
Look for a spot in the wall that allows you to feed a cable straight up into the attic.
4. Map Out the Routes of the Wires
Once you have identified the rooms that require cable hookup and determined the cable routes, it’s time to map out the exact path each cable will take.
This will help you visualize the overall wiring plan and assist with future repairs or modifications.
You don’t need to be overly precise with the cable lengths at this stage; you can always adjust them later by rolling up excess cable or cutting it to size.
5. Use a Wiring Plan App
If you’re not comfortable drawing up a wiring plan manually, there are several wiring plan apps available that can help simplify the process.
These apps can scan your house’s blueprints and generate a wiring plan based on your specifications.
Some apps are free, while others offer subscription-based services or free trial periods. Choose the one that suits your needs best.
Gathering the Necessary Tools and Materials
Now that you have a solid plan in place, it’s time to gather the tools and materials you’ll need to run Ethernet cables through walls.
Here’s a list of essential tools and materials:
Tools:
- Drill
- Punch down tool
- Pointed hand saw
- Ethernet crimping tool
- Drywall saw
- Paddle bit
- Stud finder
- Fish tape
- Label marker
Materials:
- Ethernet cable (specifications will depend on your network speed) at your required length
- Patch panel
- Ethernet sockets
- Ethernet wall sockets
- Plastic grommet
Ensure that you have all the necessary tools and materials before you begin the installation process.
This will save you time and prevent any unnecessary delays.
Installing Ethernet Cables
With your plan in place and tools ready, it’s time to start the installation process. Follow these steps to run Ethernet cables through walls:
1. Create a Distribution Point
Begin by creating a distribution point where you will connect all the network wires.
Before you start, turn off your house’s main circuit breaker to avoid any electrical accidents.
Use a stud finder to locate the studs in the wall and create an inspection hole between them.
This hole should be approximately 4 inches by 4 inches and should have no obstructions behind it.
Secure a structured wiring panel inside the hole by screwing it onto the studs.
2. Drill Holes for the Ethernet Cables
Once the distribution point is secured, drill holes for the Ethernet cables. Depending on your floor layout, you’ll need to drill either the bottom or top ceiling plate.
From there, proceed to the attic and locate a spot directly above the distribution panel.
Cut a hole through the floor plate, taking into account that most attics have double plates, which may require drilling through two blocks of wood.
As you drill, be prepared to cut through finished or brick walls using the appropriate tools.
3. Label the Ethernet Cables
If you’re running multiple Ethernet cables to different rooms, it’s essential to label each cable based on its destination.
Use clear and concise labels, such as “home office” or “bedroom,” to easily identify the purpose of each cable.
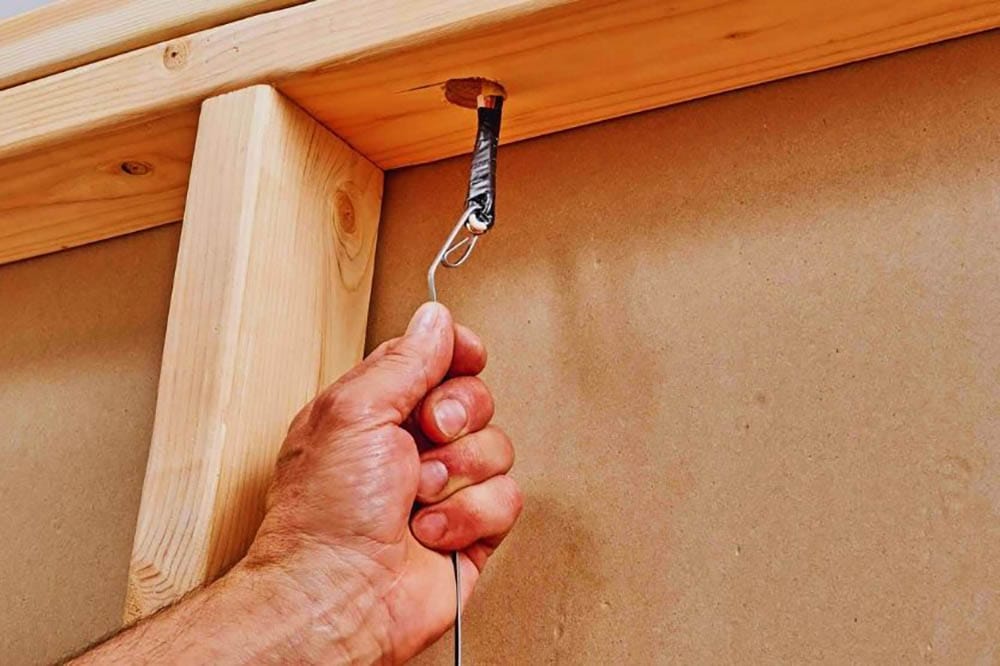
Once labeled, run the cables from the distribution point through the walls and into the attic space.
Ensure that the cables emerge from the outlet holes you created and pull them to the desired length.
Congratulations! You have successfully run Ethernet cables through walls, providing a clean and efficient network setup for your home.
Now, you can enjoy a stable and high-speed internet connection without the hassle of visible cables.
Choosing the Right Ethernet Cable
Choosing the right Ethernet cable is crucial to ensure optimal network performance. Here are a few factors to consider when selecting an Ethernet cable:
1. Network Speed
The type of Ethernet cable you choose should align with your desired network speed.
Ethernet cables are categorized based on their speed and ability to transfer electronic data over the cable.
Ensure that you select a cable that supports the speed requirements of your internet connection.
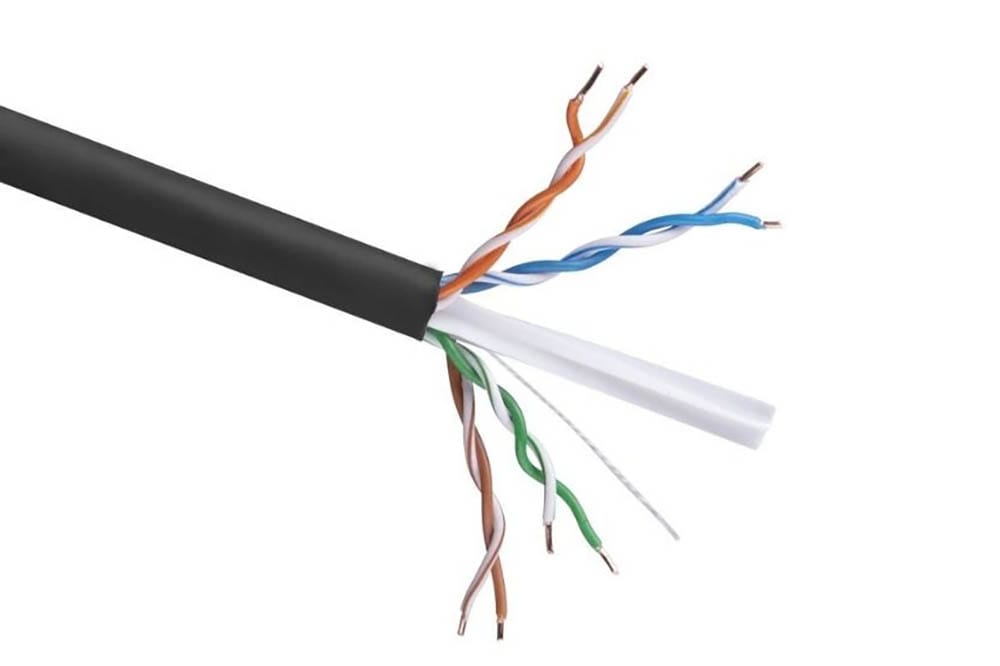
2. Cable Material
Opt for Ethernet cables made of full bare copper rather than Copper Clad Aluminum (CCA) cables.
Full bare copper cables provide better power delivery and are less prone to overheating. Investing in high-quality cables will ensure a reliable and durable network connection.
Conclusion
Running Ethernet cables through walls is a worthwhile endeavor that can significantly improve your network performance and aesthetics.
By following the steps outlined in this guide, you’ll be able to successfully run Ethernet cables through walls and create a clean and efficient network setup in your home.
Remember to plan meticulously, gather the necessary tools and materials, and choose the right Ethernet cable for your needs.
With a little bit of effort and patience, you’ll enjoy a stable and high-speed internet connection throughout your home.